-->

Circuit Flying Tips – The Perfect Circuit From Start To Finish

For student pilots, flying repeat circuit pattern procedures around their aerodrome will form a large part of their training. In this blog, we reveal circuit flying tips to help you get it right from start to finish.

What is a “circuit”?

CASA describes standard circuit procedure as follows:

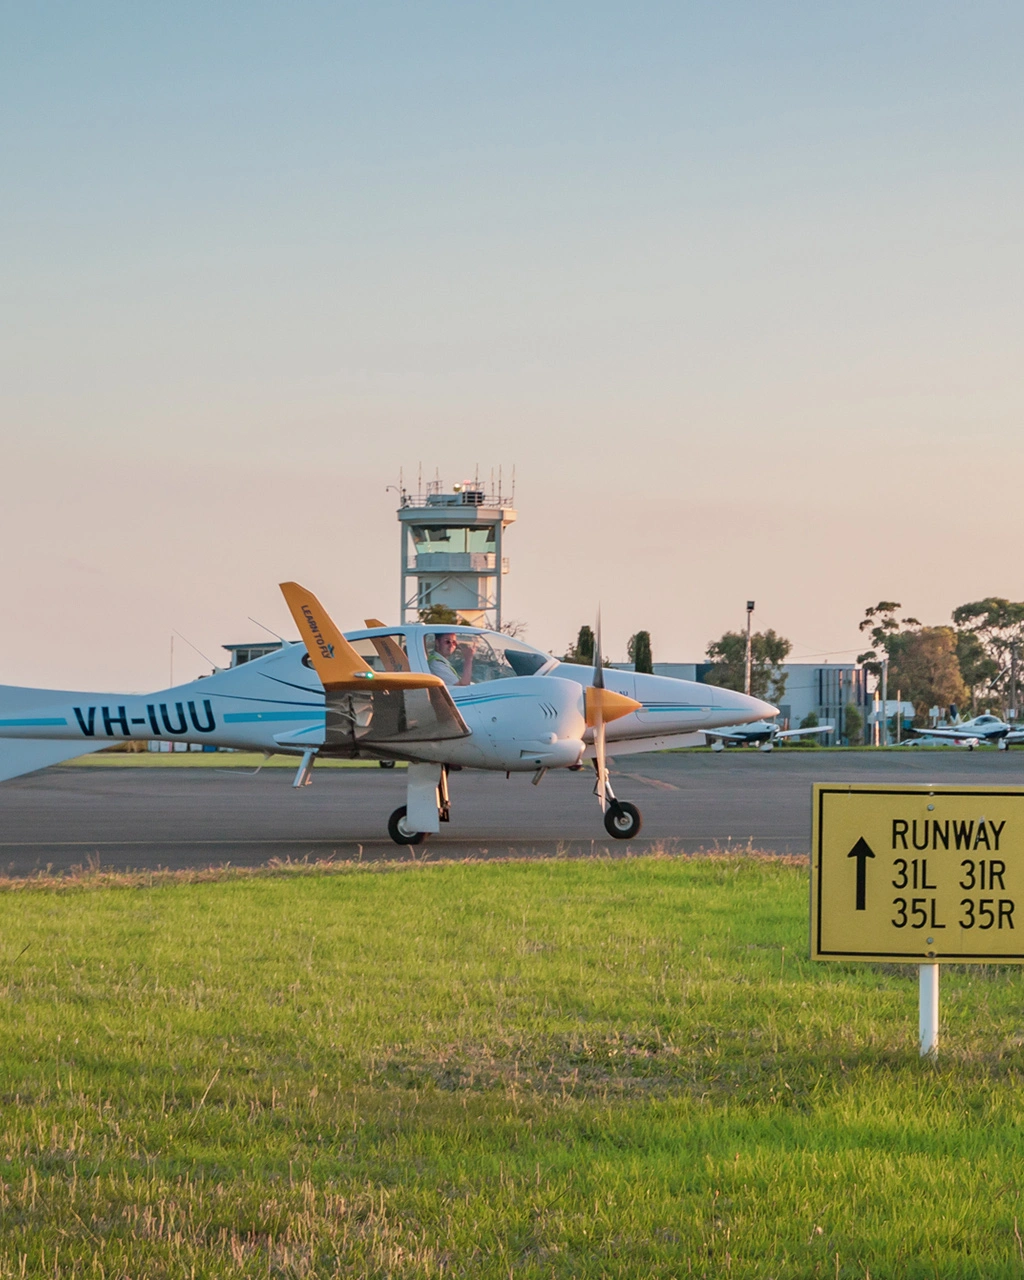
“The standard aerodrome traffic circuit pattern facilitates an orderly flow of traffic and is normally a circuit pattern made with all turns to the left. When arriving at an aerodrome to land, a pilot will normally join the circuit upwind, crosswind (mid-field), or downwind (before mid-downwind). Landings and take-offs should be made on the active runway or the runway most closely aligned into wind. If a secondary runway is being used, pilots using this secondary runway should avoid impeding the flow of traffic on the active runway.”

The circuit pattern is the orderly take-off and landing flow of aerodrome traffic. Maintaining it is crucial to even the most major airports. Procedures will vary locally at different aerodromes that may have other factors to consider (terrain etc).

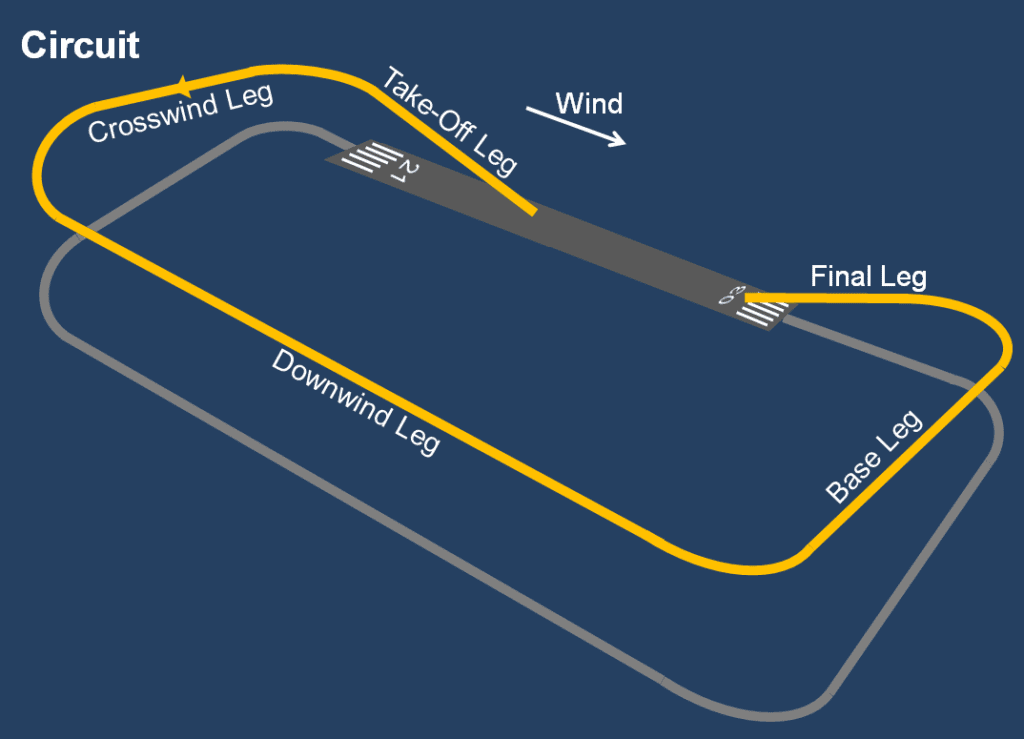
There are five basic legs to circuits:

– Take-off Leg
– Crosswind Leg
– Downwind Leg
– Base Leg
– Final Leg

While it might seem like a fairly standard or boring flying procedure to many people, circuit flying forms the basis of any pilot’s training.

Circuit flying includes fundamental flying syllabus including take-offs, climbs, climbing turns, medium level turns, straight and level flying, descending, descending turns, slow flying and landing. It’s also crucial to developing your separation skills as the presence of other air traffic is common.

Circuit Flying Pattern
The circuit flying pattern can be split up into 5 flight legs.

The definition of a perfect circuit

According to CASA, a perfect circuit will see the pilot completing the following:

– Take-off and then climb to 500ft (approx 150 metres)
– Turn onto crosswind leg (perpendicular to the extended runway centreline)
– Climb to 1,000ft (approx 300 metres)
– Reference aerodrome for turn point and turn onto downwind leg
– Reduce power, turn onto base and commence descent
– Turn onto final leg and land

There are many factors that can intervene and subsequently make it harder for you to complete that textbook perfect circuit flight. These include:

– Traffic
– Wind
– Light
– Glare

External factors aside, the best method for putting together a perfect circuit is to look at perfecting each of the legs individually.

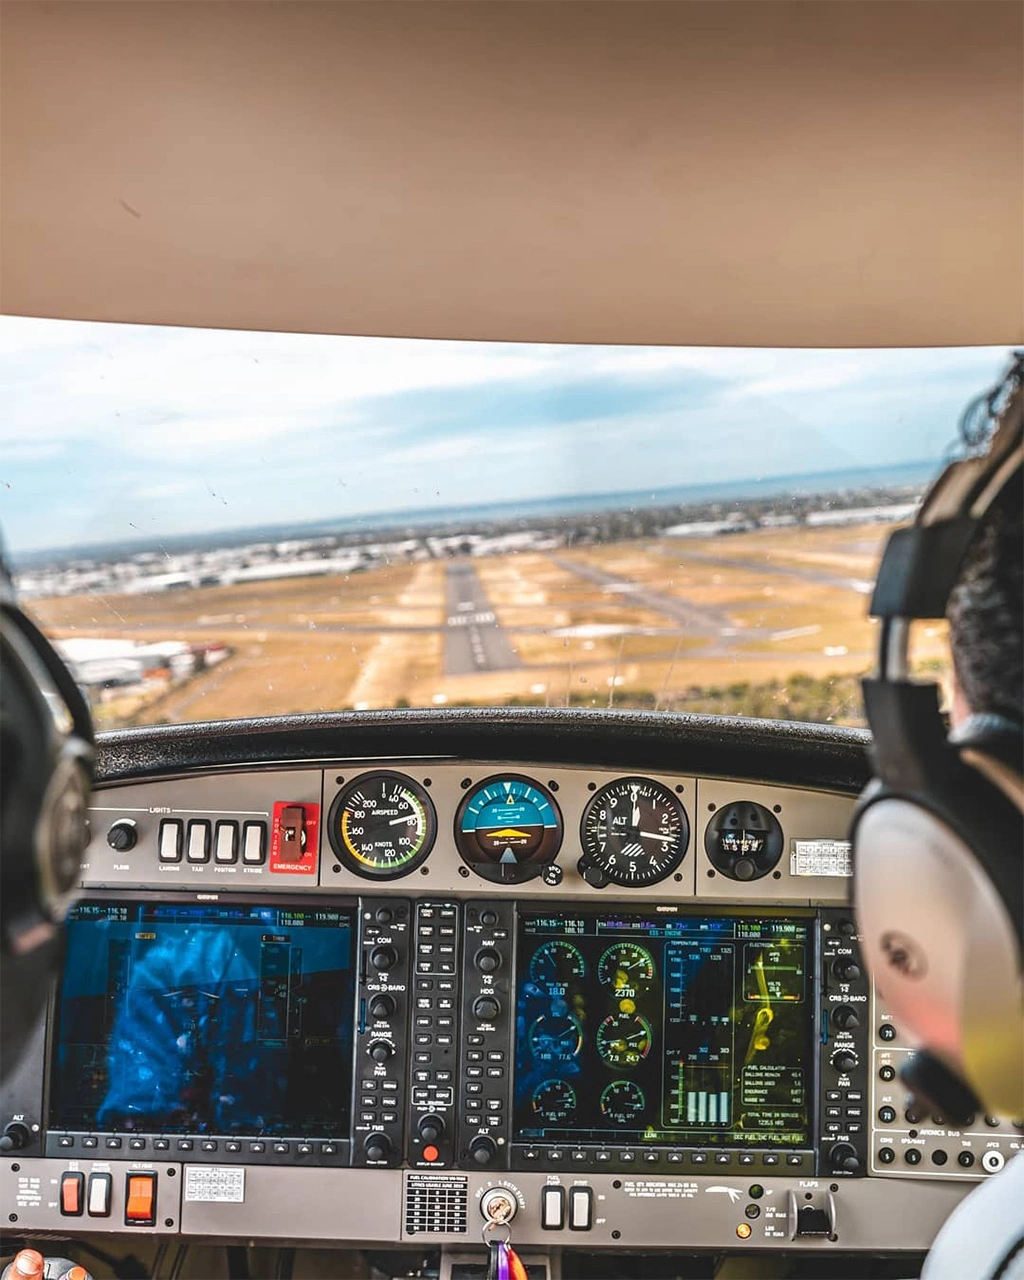
Departure (take-off) leg

When airborne, find the attitude that allows you your nominated climb speed on full power. As soon as the attitude is established, find a reference point on the horizon and aim at that.

Once you have established your climb to a safe altitude (300ft or above), complete your take-off checks including a glance back to ensure your reference point is maintaining the extended runway centreline. Look for a reference point for your turn, just ahead of your left wing’s leading edge.

A clean take-off and a good setup into your first turn is essential for smooth circuit flying.

Crosswind leg

Begin your turn after you have reached an altitude of at least 500ft, although 750ft is the CASA recommendation. As it is a climbing turn, look to bank the aircraft at a 15 degree angle.

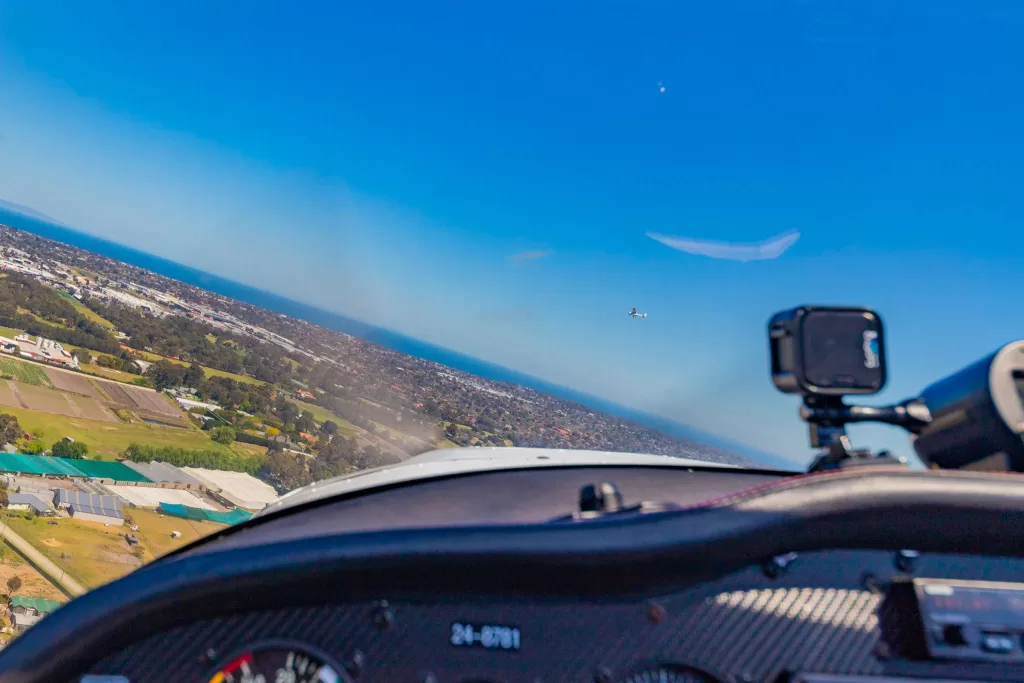
As other aircraft commonly join a circuit pattern on the crosswind eg at circuit height, keep a good lookout for traffic, and then adjust to maintain separation. Once the turn is made, maintain your attitude and power, and look for a reference point for the downwind turn.

Downwind leg

The turn onto downwind is generally made when your aircraft is at 45 degrees to the upwind threshold, onto a suitable reference point so as to track parallel to the runway. Depending on adjustments made for separation, you will either need to be level the aircraft at circuit height (1000ft) before, during or after the turn onto downwind. Lookout is again stressed, as traffic may also be joining the circuit on the downwind leg.

If a downwind radio call is required, it should be made when abeam of the upwind threshold. You should confirm your position in the circuit. Making a visual search by scanning from the threshold back along the final approach to base and then to downwind ahead of you. Identifying other aircraft positions within the circuit.

Maintain straight parallel flight by visually running the runway through the wingtip. Then you can complete your landing checks. Say each one out loud as you do them. Consider a reference point for your turn to base.

Base leg

As you are reaching a point in line with a 45° angle from the threshold, pick your reference point along the wing. Then make the base radio call if required. The best time to make the call is just before commencing the turn, as a turning aircraft is more easily seen by others in the circuit.

Reduce the power (1500-1700rpm as a guide) and then start a medium level (30°) turn. There’s no need to adjust your trim, as you will naturally wash speed in the turn whilst holding height at reduced power. Continue the turn onto your reference point, allowing for drift, until the leading edge of the wing is parallel to the runway.

Before the descending turn onto final, look carefully for traffic, especially along the approach path to ensure no other aircraft are on long final. Try to anticipate the roll out onto the approach (final) leg. This will help to ensure that the wings are level at the same time as your aircraft aligns itself with the runway centreline.

Throughout the turn, the angle of bank should be adjusted to achieve this by about 500ft. Adjust your altitude to maintain the nominated approach airspeed.

Circuit-Traffic
Circuit flying has a number of threats to look out for, and one of the major ones is other traffic.

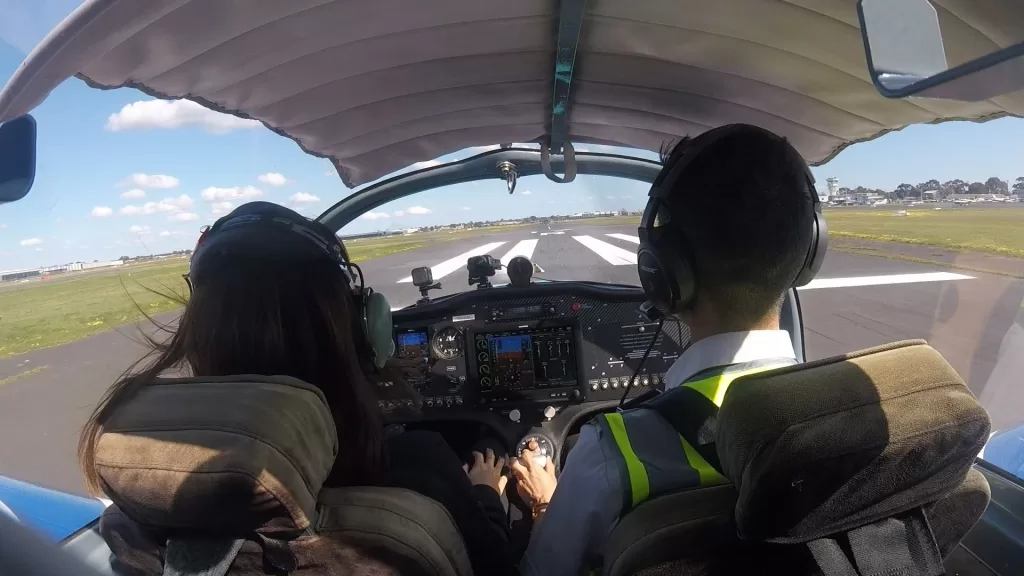
Final (approach) leg and landing

During the approach, as with all phases of flight where the intent is to maintain a specific airspeed, it is important to emphasise that you should select, hold and trim the correct altitude for the desired airspeed.

When established on final, select full flap at the appropriate time and maintain your airspeed. Or allow it to decrease through attitude adjustment. Avoid extending your flaps during the turn onto final.

Select an aiming point on the runway (commonly the numbers, or the threshold), and then monitor and adjust your power as required to maintain a steady rate of descent to touchdown. If the aiming point moves up the windscreen, increase power – and if the aiming point moves down the windscreen, decrease power.

If you have trimmed the aircraft correctly, then the power adjustments should be small.

Your landing should be one smooth manoeuvre that slows the rate of descent to zero, and the speed to just above the stall speed, as the wheels touch the ground. When you have have assured your landing, often described as “crossing the fence”, close the throttle and progressively raise the attitude of the nose.

Gradually increase backpressure to achieve the correct attitude, so that your touchdown is light and on the main wheels only. Following touchdown on the main wheels, gently lower the nosewheel to the runway using the elevator. Use a reference point at the end of the rudder to keep straight on the runway centreline with your rudder, and then apply your brakes as required.

And there you have it! There will always be factors that require you to adjust things, but if you use this as a guide, then you will be well on your way to perfecting your circuit flying.

You can get more flight training tips by subscribing to our YouTube channel. We have RPL/PPL flying lessons, aircraft pre-flight check videos, and more. Check out our lesson on circuit flying, the click the button below to subscribe!

Chat to one of our flight training specialists to get your pilot training off the ground. Email [email protected] or go to https://drift.me/learntofly/meeting to book a meeting and school tour.

Learn-To-Fly-Melbourne-Youtube-Subscribe-Footer

Final Flight Departure Procedures: Flight Departure Processes Part 3

In this blog series on flight departure processes we have covered engine starts, taxi checks, run-up checks and more. Now it’s time to run through the final flight departure procedures and take to the skies!

Use the TMPFISCH acronym

The proper acronym that applies whenever holding short is TMPFISCH, and it is what I usually use for my operations here in Hong Kong. It goes like this:

T – Trims set to the appropriate take-off position

M – Mixture rich, master on and magnetos on both

P – Primer in and locked (or fuel pump off)

F – Fuel is sufficient for the coming flight and flaps are set

I – Instruments’ Ts and Ps are in the green range

S – Switches (landing and strobe lights on)

C – Controls full and free

H – Hatches secure and harnesses secure

When you do your controls part of this departure check, make sure your box the controls. That means to move the controls in a movement of a box and ensure you have still got adequate freedom of movement. You might have a mile-long taxi, and something might have jammed the controls. Never skip this check as part of your final flight departure procedures.

Deliver your safety brief

You can do the EFATO brief (Engine Failure After Take-Off ) at any stage before the take-off, but I typically do it after run-ups. A typical brief should describe the actions that need to happen in the event of an engine failure at particular stages of the flight, such as:

During take-off

After rotation

Below 200 feet and with runway remaining

Above 200 feet with no runway remaining

Above 700 feet.

The brief goes something like this:

“If we have an engine failure on the ground, we stay on the ground. If we have an engine failure below 200 feet, we land on the remaining runway. If we have an engine failure above 200 feet, we land straight ahead or 30 degrees to the side. If we have an engine failure above 700 feet, we will turn back to find runway X.”

On a standard Cessna or Sling, 700 feet is plenty for a runway turn-back manoeuvre. However, during the turn back you MUST lower the nose to maintain airspeed and limit the angle of bank to 45 degrees. Never attempt a runway turn-back if an engine failure occurs below 700 feet!

Ready to go

You are lined up on the runway, and ready to take to the skies. It’as always an exciting moment for any pilot. However, discipline must be maintained during the final flight departure procedures.

Ensure you are on the correct runway by looking at your directional gyro, which will indicate the proper runway heading. It’s also a good practice to cross-check this reading with the magnetic compass as well. After that, you should triple-check with making sure that the runway numbers are indeed the intended runway. Everything checks out? Good.

Time to fly!

Now the take-off roll can begin. Ensure that your heels are on the floor and that you are controlling rudders only with the balls of your feet; this will ensure that you do not inadvertently apply the brakes! After you complete this, you should use full power – smoothly but with purpose – and count three, one-thousands before going all the way with to full strength.

After full power is applied, check on the RPM. They should be reading at or above the stated minimum static full-throttle RPM. At this stage, you should also check the oil temperatures and pressures and ensure that these are still sitting within the green range. Finally, you should check to ensure that the airspeed indicator is ‘alive’, meaning that it is indicating an acceleration.

At rotation speed, gradually apply back pressure and lift the nose wheel off the ground, allow the aircraft to fly off the runway and then adopt a Vy (best rate of climb) attitude to ensure maximum climb performance. Look outside! Once you are above 300 feet AGL and obstacles are cleared, move the flaps to up and auxiliary fuel pump (if applicable) to off. You should once again check the oil temperatures and pressures.

The result of following the correct final flight departure procedures? A smooth take-off, followed by another safe and beautiful flight!

Thank you to student pilot Howard Lau for contributing this great series on flight departure procedures.

IMSAFE-For-Pilots
With the final flight departure procedures done, it’s time to fly!

Find out what it feels like to take to the sky! Email [email protected] or visit https://drift.me/learntofly/meeting to book a meeting and school tour.

Learn-To-Fly-Melbourne-Youtube-Subscribe-Footer

Flight Pre-Departure Checks: Flight Departure Processes Part 2

In Part 1 of our flight departure processes series, we laid the groundwork to set ourselves up. In this post, we will go through your flight pre-departure checks. This includes engine starts, taxi checks and run-up checks. Following these checks we’ll be heading to the runway.

Perfect priming

Let’s start our flight pre-departure checks with the most important thing. Safety. Crack open the window and say, ‘CLEAR PROP’. Make sure you give people time to stand clear and scan the area before you move on with your other procedures.

Next, place one hand on the throttle and start cranking the starter, but for no longer than ten seconds each time. If the engine does not fire within 10 seconds, stop cranking right away and wait a minute so the starter motor can cool down. Try some light priming when you’re ready to have another go—it works wonders.

When the engine fires, release the starter promptly. If you’re flying a plane with a fuel-injected Lycoming engine, adjust the mixture to full rich.

Green means go

After a successful engine start, you will need to check that the oil pressure is rising (or has correctly risen) into the green range. This is crucial because oil pressure indicates whether metal components in the engine are sufficiently lubricated.

If oil pressure is not within the green range, shut the engine down immediately and report this to the engineer.

As long as the pressure looks good, you can raise the flaps (if left down after pre-flight), turn on the taxi and navigation lights, and turn on the avionics master switch. Only now should you don and adjust your headsets.

Eyes forward

When taxiing, you should aim to minimise the time you spend with your head down – literally so you don’t bump into anything.

It has become normal for pilots to use GPS devices and iPads (used to run apps like OzRunways) in the cockpit. It is ironic, therefore, that when we attempt to program devices while taxiing we put ourselves at risk of having an accident.

The only exception I make to this rule of my flight departure process is to check the turn instruments. I like to quickly glance down and ensure that:

The slip ball is deflecting properly

The turn coordinator is indicating correctly

The direction gyro turns in the proper direction

The attitude indicator stays erect

The magnetic compass turns in the proper direction.

Remember the CIGAR acronym

I like to do my run-up checks using the acronym ‘CIGAR’. Here is how it works:

Controls – full and free and control surfaces deflect correctly

Instruments – all in the green range, the ammeter is charging and the suction is in the green range

Gas – check the mixture and fuel selector

Airframe – secure the canopy, doors and windows, and make sure your parking brake is on

Run-up – set the correct run-up RPM, check the brakes, check the magnetos, note when the RPM drops (on the Sling with the 912iS engine, one must check that both engine fuel pumps are working), pull the throttle to idle and ensure the engine does not seize at idle

After the run-up, the engine should be set to the ground idle speed as recommended in the POH.

Thank you to student pilot Howard Lau for contributing this great series on flight departure procedures. Stay tuned for the third and final instalment coming soon, as we head to the runway!

Flight-Pre-Departure-Checks
CLEAR PROP! Safety comes first when completing your flight pre-departure checks.

Find out what it feels like to take to the sky! Email [email protected] or visit https://drift.me/learntofly/meeting to book a meeting and school tour.

Learn-To-Fly-Melbourne-Youtube-Subscribe-Footer

Flight Departure Processes: Part 1 of 3

With so many other things in life, it’s easy enough for you to just remember something once you know it. Then it’s no problem to repeat it. Like driving. But flying is different. There are checklists and acronyms (and more checklists) for a reason. There are far more safety considerations when you are flying, and following the right flight departures processes will help to ensure you have a smooth and safe flight, every time.

Walk the walk

A successful and safe flight begins before you even turn on the master switch. It all starts on the tarmac as you approach the aircraft. Your flight departure processes should involve asking yourself lots of questions:

Are the tie-downs done properly?

Are the tyres inflated correctly?

Is there any pink hydraulic fluid around the aircraft?

Is there any blue fluid around the aircraft reminiscent of Avgas?

It has been scientifically proven that asking yourself questions is the most effective way to stay in the loop of information.

Feel the wind

You should not only ask yourself about the aircraft or about the ‘now’ but also ask questions that will bring into effect a successful take-off. Personally, I like to ask myself these:

Should I use flaps or not?

What technique will I use for these conditions? Short field or normal?

Should I delay my rotation for density altitude, load or gusts?

What crosswind correction should I be using during taxi and initial roll?

These questions really are the basis for me completing smooth and safe flight procedures. They help me make sure I’m always ready to respond to new information. On that note, try to make sure you always pay attention to your surroundings. Feel the wind, look at the windsock, listen to the wind and feel the temperature on your skin. Forming attentive habits and looking out for these cues will allow you to prepare for a better flight.

Take it easy

After a normal interior and exterior pre-flight check has been completed, and the aircraft is confirmed to be in safe working order, we can proceed to the engine start. My secret tip is don’t rush!

I’ve had the fortune to fly with the training captain of a major airline in Hong Kong, who is also a tailwheel aircraft instructor and aerobatic pilot. He said these wise words I will never forget, ‘Don’t rush because if you rush you will kill yourself one day.’ I could not believe the severity of his words given his experience in aviation! Needless to say, I listened to his advice.

Get ready for ignition

Before I start the engine, I like to plug in the key, and with the master switch off, I rotate the key to start and then release it. The key should immediately snap back to the both position. This is a simple pre-start ignition check that I learned during my time as an aircraft maintenance intern in Hong Kong.

What this check does is make sure that the starter motor does not engage when the master switch is off, the key locks into position properly and the spring mechanism works.

Prepare the cabin

With the pre-start ignition check completed, I check the cabin. This is when you should adjust your harnesses and seats to your satisfaction, and keep a window or the canopy open. After ensuring that the propeller area is clear, flip on the beacon light switch and the master switch.

Look at your ammeter—it should show a discharge. Check your oil temperature to gauge the amount of priming required or (if it’s the Rotax 912ULS equipped Sling 2 or the Bristell at Learn to Fly) the use of choke. Ensure all circuit breakers are in and the avionics master switch is off.

Wait for it

One of my pet peeves at this stage is pilots who don their headsets before the engine has started. What if someone was trying to get your attention about an unfolding emergency? With the headset on, you wouldn’t be able to hear them. Instead, remove the headset from the dashboard and put it on your lap so you can have maximum visibility out of the windscreen.

An unwritten rule

Set the fuel selector in accordance to the POH and prime as required. After priming, ensure the primer pump is in and locked or, alternatively, that the auxiliary fuel pump is off. If the plane has a fuel-injected Lycoming machine, check that the mixture is set to full rich. If you’re ever in doubt, start with no prime. This will avert the possibility of flooding the cylinder heads due to excessive priming.

Thank you to student pilot Howard Lau for contributing this great series on flight departure processes. Stay tuned for the next part, where we run through flight pre-departure checks.

Flight-Departure-Processes-Female-Pilot
Getting your flight departure processes right ensures the safest start to your flight.

Find out what it feels like to take to the sky! Email [email protected] or visit https://drift.me/learntofly/meeting to book a meeting and school tour.

Learn-To-Fly-Melbourne-Youtube-Subscribe-Footer